Here are five of the heaviest items among backpacking gear.
When choosing backpacking gears, I mainly refer to outdoorgearlab.com. It scores each item across categories, making comparisons easy.
This guide will help you to choose gear using that site.
1. Tent
On outdoorgearlab.com, tents are categorized into Backpacking Tents and Ultralight Tents.
🔗 Backpacking Tents are typically the 1-person size of a general tent, usually weighing about 3–5 lbs. Any product under 4 lbs on this page is a solid choice.
🔗 Ultralight Tents eliminate the tent poles and instead use trekking poles instead. This reduces weight and volume, usually keeping the tent under 2 lbs.
However, you need to firmly secure at least four corners, making it difficult to set up on rock or tight space.
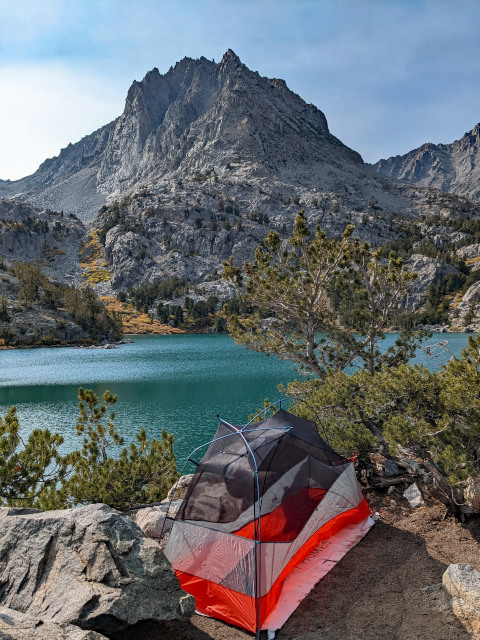
This spot is difficult for Ultralight Tents.
If you are unsure, pick one from Backpacking Tents and move on to the next gear.
2. Sleeping Bag
Like tents, outdoorgearlab.com classifies sleeping bags into two types.
🔗 Backpacking Sleeping Bags are the familiar style of sleeping bag, most of which look similar. You can use these numbers to help make your selection:
- Temperature Rating: The coldest temperature you can use it in.
- Fill Power: How light and efficient the insulation is.
Price depends on these factors. Once you know the target temperature, the rest is straightforward. Spending more usually means a lighter bag with smaller compressed volume.
Temperature Rating 🌡️
⚡ TL;DR: For your first sleeping bag, Choose a bag rated in the 20-30°F range.
Assuming backpacking in California, I recommend a Temperature Rating in the 20°-30°F range because of following reasons:
- Popular backpacking destinations in California are typically above 8,000 ft.
- These areas are accessible only between June and October without snow gear.
- Snow gear is outside the scope of this guide.
- July and August can be very hot and often canceled due to wildfires, so it’s best to avoid them if you were to go backpacking once a year.
This leaves early summer and fall, when temperatures above 8,000 ft usually drop to around 40°F. Note that Temperature Ratings is not the temperature suitable for comfortable sleep, so select a rating 10°-20° lower than your expected sleeping temperature.
Fill Power 🪶
💡 Rule of thumb: Spending $100 to reduce 1 lb is a great deal—especially for sleeping bags, where lighter weight also means smaller packed volume.
Fill Power measures the quality of the down insulation: the higher the number (e.g., 650 vs. 850), the lighter and more compressible the sleeping bag for the same warmth. In other words, higher Fill Power means better warmth-to-weight efficiency but also a higher price tag.
Once you’ve set your temperature rating, decide how much to invest in Fill Power, then pick one from Backpacking Sleeping Bags.
🔗 Ultralight Sleeping Bags come in two types:
- The first are sleeping bags of the regular shape but with higher Fill Power for lighter weight and smaller volume.
At this price range, spending $100 more often has little effect, so we will skip this for now.
- The second type is the quilt style, which is open at the back.
- If you sleep on your back, choose a standard bag and move on to 3. Sleeping Pad.
- If you sleep on your side or stomach, keep reading:
Quilt
I often sleep on my side or stomach, which is awkward in a traditional sleeping bag. However, a quilt is open at the back and secured to the sleeping pad with elastic bands, making it easier to move. Watch this video for a demonstration.
Quilts offer great value for money because the material is reduced by the amount of material omitted from the back. That’s why their weight is also lighter than standard sleeping bags of similar temperature rating, but on the other hand, the sleeping pad touching your back must have good insulation.
💬 FYI, I use the Enlightened Equipment’s Revelation, but if I were to buy again, I’d choose the Enigma from the same brand.
The difference is whether feet area can be opened or completely sealed. Revelation’s feet area can be unziped. but more expensive and leaves a tiny hole at the end no matter how tight you close it using an elastic cord.
3. Sleeping Pad
🔗 Backpacking Sleeping Pads are all listed on a single page, as outdoorgearlab.com doesn’t separate products for Ultralight Backpacking.
The key metric is R-Value, which indicates insulation. Unlike sleeping bags, it’s not temperature-rated. So this table comes from REI - How to Choose Sleeping Pads is useful:
| Warm | Cool | Cold | Extreme | |
|---|---|---|---|---|
| Min Temp | 50°F | 32°F | 20°F | 0°F |
| R-Value | Under 2 | 2 - 3.9 | 4 - 5.4 | 5.5+ |
| Sleeping Bag Temp Rating | 30°F | 20°F | 15°F | Under 0°F |
The lowest temperature I mentioned when introducing sleeping bags above was 40°F. According to this table, an R-Value of 2-4 is suitable in that environment.
I personally use warmer pads (with an R-Value of 4 or higher) because I took into account that when using a Quilt.
- My back is in direct contact with the sleeping pad.
- It is easier to control temprature by putting my arms or legs out of Quilt when it is too warm.
The surest way is to try it yourself. When the minimum temperature in your area drops below 50°F, buy one from a store with a good return policy, like REI, and sleep on it for one night.
4. Stove
A stove may seem insignificant because it is small, but packing them with fuel inside a pot requires planning. Since stove, fuel, and pot are used together, nesting everything inside the pot is efficient.
This video will give you idea. It is a bit long, so feel free to skip through it.
In 🔗 Backpacking Stoves page, Jetboil products look distinctly different from others. Since deciding whether to choose Jetboil makes selecting the rest easy, I will focus my explanation on it.
Jetboil 🔥
To compare Jetboil with other stoves, we must include the pot that would be used with them, right? So, I compared it with the 850mL pot and stove that I use:
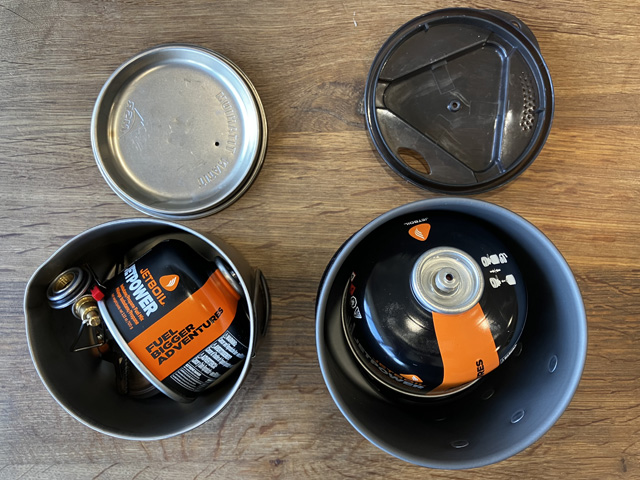
The weight difference is about 160g. It might seem negligible, but it is similar to the combined weight of a GoPro camera and battery.
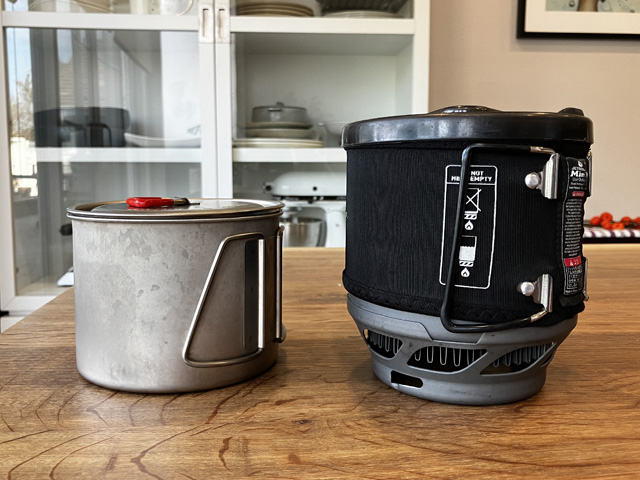
You may not care about weight difference as much, but see how significant the volume difference is!
✅ Conclusion: I’d take Jetboil only if:
- Forecast predicts 30+ mph wind, but I want to cook ramen: Many stoves won’t go out in strong winds if you turn the gas up high. However, when you want to simmer a meal on a low flame without boiling over, no other stove is as good as the Jetboil at protecting a low flame from the wind. With a standard stove, you would have the hassle of having to block the wind in various ways or relighting the flame if it goes out.
- Backpacking 3+ nights: The smallest gas canister has a capacity of 100g. This amount of gas is sufficient for most stoves for up to 2 nights, but it might not be enough for a 3-night or longer trip. To carry more gas, you would have to choose the 250g size, which defeats the purpose of reducing weight and volume. However, the Jetboil is highly efficient, and 100g is often sufficient for a 3-to-4-day trek.
If neither is an issue, skip Jetboil and pick a standard stove from Backpacking Stoves. However, I recommend figuring out which pot you will use beforehand and choosing a stove which can be nested.
5. Backpack
A backpack is the heaviest item, so it should have been introduced first if the list was ordered by weight, but I waited until now because the backpack choice can be influenced by the gear you have selected so far.
🔗 Backpacking Backpacks — If you followed recommended products, a 60L pack should hold everything. I recommend choosing a product that weighs under 4 lbs from this category.
🔗 Ultralight Backpacks — If you picked Ultralight tents and sleeping bags, choose from this category instead. These packs are smaller, sometimes frameless, and weigh around 2 lbs.
More than other gears, backpacks are a matter of personal preference, so I recommend trying them out before purchasing. Buying from REI, which has an easy refund and exchange policy, is also a good option.
Torso Size 📏
Beginners purchasing a backpacking pack often think of volume when talking about size (e.g., 55L, 60L). However, a backpack’s volume is fixed by the model; within the same model, it is categorized into Small, Medium, and Large based on the torso size.
Backpacks are mainly supported by the hips; shoulders balance the load. You don’t lift with your shoulders. This video helps illustrate:
To maintain that balance, it is crucial to match the backpack’s torso size to your body shape.
If it is your first time, getting help from a store employee is recommended. At REI, an employee will use a tool to measure your torso length while you wear the hip belt.
What about the rest of the gear?
Now that I have covered the gear that can affect your backpack choice, I will provide a list of everything else I carry in my backpack as a substitute.
Of course, if I was satisfied with the initial gear setup, I would have kept using it. I had some regrets, so I started changing items one by one.
But the reason I also share the old gear too is because I’m not sure if I would have spent more money and chosen the gear I currently use from the very beginning.
💬 If you have any questions or feedback, please leave a comment!
To run this site ad-free, writing a comment requires a GitHub account. Thank you for understanding the extra step! 🙏